Wednesday, 25 November 2015

How to Use the Checkstyle plug-in?

Checkstyle is the plug-in for Eclipse IDE. With the help of this plug-in we can improve our Java coding standard. This plug-in provides the availability to check the trailing spaces, unnecessary spaces, tab characters, etc. Checkstyle can help with good programming practices, which improves the code quality, readability, and re-usability of code.
How to Install in Eclipse IDE?
  • Open Eclipse IDE.
  • Go to Help and click on “Eclipse Marketplace” as shown below.
How to Use the Checkstyle Add-on?
  • Enter “Checkstyle plug-in” in the Find input field and click on “Go” button as mentioned in the below-given figure.
Checkstyle plug-in
  • Click on the “Install” button to install the plugin in the Eclipse Editor.
  • Go to Eclipse ->Windows->Preferences->Checkstyle->New and enter the name for the Style code, like “IV-CodeStyle” as shown below.
IV-CodeStyle
  • Click on the “OK” button.
  • Select the created “Check Style” option and click on the “Configure” button.
Check Style

  • Select “Whitspace” and then click on the “Add” button to add the standards of whitespace in your created “IV-CodeStyle” configuration.
Whitspace

  • Click on the “OK” button.
  • Click on the “Set as Default’ button.
Note: In the same way we can add different Standards for the “Naming Conventions”, “Annotations”, etc.

How to Perform Advanced Visual Testing with Selenium?

Automated visual testing is often considered a difficult task in the software industry. However, this is just a misconception. Due to this false impression, people fail to capitalize from the easy implementation of visual testing.
Visual testing caters the need to verify the Graphical User Interface (GUI) of an application from the users’ perspective.  The process helps in identifying bugs related to font, layout, etc., so that they can be fixed before being used by end-users. In addition, it overcomes the verification challenges associated with conventional testing tools, especially in case of sites having graphical functionality, including charts, dashboards, etc.
With the advancement in technology, there has been a rise in the number of web browsers, operating systems, responsive designs, etc. This has eventually made visual testing quite complex. However, today there are a number of open source and professional tools to handle this, making the life easier than before.
Automating a visual test will ensure optimal performance of each page. It checks each element and tells you if any of them are not rendered properly. This happens each time you run the test. Moreover, you can extend this to each browser, OS, design, and more.
In other words, an automated visual test takes you one step forward towards continuous delivery.
Solution 
Automated visual testing is quick and easy by using an existing solution. Each tool follows a similar workflow. However, there are some variations.
  1. Run the application being tested and take a screenshot.
  2. Compare the screenshot with the standard image.
  3. Note the differences.
  4. Update the standard image as and when required.
Example
Consider working with a Selenium WebDriver to test an application on the Internet. Assume there is a menu bar along with a button that shifts 25 degrees on either side each time the page loads.
Once you have started the Selenium Standalone Server, you need to create another file. You need to include the necessary libraries and configure Selenium to get connected to the standalone server.
You can get the driver object to interact with the browser, as shown below.
How to Perform Advanced Visual Testing with Selenium?
The above-mentioned commands allow us to mention the areas on which we want to perform visual testing.
Consider the following body page.
How to Perform Advanced Visual Testing with Selenium?
You can use the assert command to ensure there are no visual changes after running the test again. The Webdriver CSS takes the screenshot each time the script is run. The first shot acts as a baseline and is compared with the subsequent shots. If there is a mismatch, then the script will fail. The baseline needs to be updated if the script keeps on failing.

Tuesday, 24 November 2015

Use of page objects page factory in Selenium

PageObjects
The code of automated test cases should be easy to understand and not too complex. If a test fails, we want to know why and this as soon as possible. To allow this exists PageObjects. PageObjects are classes that contains WebElements and every actions associated with those.
A PageObject looks like this:
class HomePage {

    WebDriver driver;

    public HomePage(driver) {
        this.driver = driver;
    }

    // Find a single element
    @FindBy(id="home-menu-entry")
    WebElement homeMenuEntry;

    public void clickHomeMenuEntry() {
        homeMenuEntry.click();
    }

    // Find several elements
    @FindBy(className="menu-entry")
    List<WebElement> menuEntries;

   // More actions and elements
}
Usage of PageFactory and PageObject
class TestSomething {

    public void testMethod() {

        // Initial driver.

        // Use PageFactory to init elements.
        HomePage hp = PageFactory.initElements(driver, HomePage.class);

        // Use PageObject to execute action.
        hp.clickHomeMenuEntry();

        // Assertions or more actions.

    }

}
You also can put the PageFactory.initElements(); into the constructor and create just an HomePage object instead of calling the PageFactory method.
Important: If you call initElements() all elements will be initialized, not later if you use them.
How to organize this?
I do the following: Each page has a PageObject, that represent these. But some components of a page are present on many pages. For this case I create for each component additional classes. Example:
  • Header.class
  • Footer.class
  • HomePage.class
  • ContactPage.class
Useful Links

How to add TestNG to the project.


1) Go to eclipse.
2) Help
3) Eclipse Marketplace
4) In Find, search for TestNG
5) Install 'TestNG for Eclipse'
6) Then Right click on your project and Navigate to Build Path then click on Add Libraries 
7) Select TestNG and click on next and finish it.

How to Upload a file in Selenium

How to upload resume in naukri.com

Note- here in the code just give the path of your file which you want to upload and run the code, it will upload your file in naukri.com. And Supported File Formats: doc, docx, rtf, pdf. Max file size: 300 Kb.
ex- path of the file which u want to upload = C:\\resume.doc

import java.util.Iterator;
import java.util.concurrent.TimeUnit;

import org.openqa.selenium.By;
import org.openqa.selenium.WebDriver;
import org.openqa.selenium.firefox.FirefoxDriver;

public class UploadResumeInNaukari {
    public static void main(String[] args) {
        WebDriver driver = new FirefoxDriver();
        driver.manage().timeouts().implicitlyWait(10, TimeUnit.SECONDS);
        driver.get("http://www.naukri.com/");
      
        driver.findElement(By.xpath("//a[text()='Post Resume']")).click(); //click on post resume
      
        driver.switchTo().frame(driver.findElement(By.id("frmUpload"))); //browse button is under frame so 1st switch control to frame
        driver.findElement(By.id("browsecv")).sendKeys("path of the file which u want to upload");
 }

}

How to count the number of checkboxes checked in selenium webdriver ? or How to select multiple check box and verify ?

Note- Here 1st alternative checkbox has been selected, then it has been verified that which checkbox is selected and which is not selected.

import java.util.List;
import java.util.concurrent.TimeUnit;

import org.openqa.selenium.By;
import org.openqa.selenium.WebDriver;
import org.openqa.selenium.WebElement;
import org.openqa.selenium.firefox.FirefoxDriver;

public class MultipleCheckBox {
    public static void main(String[] args) {
        WebDriver driver = new FirefoxDriver();
        driver.manage().timeouts().implicitlyWait(10, TimeUnit.SECONDS);
        driver.get("http://www.gsmarena.com/samsung-phones-9.php");
        List<WebElement> checkBoxes = driver.findElements(By.xpath("//input[@type='Checkbox']"));
        for(int i=0; i<checkBoxes.size(); i=i+2){
            checkBoxes.get(i).click();
        }
        int checkedCount=0, uncheckedCount=0;
        for(int i=0; i<checkBoxes.size(); i++){
            System.out.println(i+" checkbox is selected "+checkBoxes.get(i).isSelected());
            if(checkBoxes.get(i).isSelected()){
                checkedCount++;
            }else{
                uncheckedCount++;
            }
        }
        System.out.println("number of selected checkbox: "+checkedCount);
        System.out.println("number of unselected checkbox: "+uncheckedCount);
    }
}


output-
0 checkbox is selected true
1 checkbox is selected false
2 checkbox is selected true
3 checkbox is selected false
4 checkbox is selected true
5 checkbox is selected false
6 checkbox is selected true
7 checkbox is selected false
8 checkbox is selected true
9 checkbox is selected false
number of selected checkbox: 5
number of unselected checkbox: 5

How to change the position of the open browser window.

use command -> driver.manage().window().setPosition(new Point(int value1,int value2));

import java.awt.AWTException;
import org.openqa.selenium.Point;
import org.openqa.selenium.WebDriver;
import org.openqa.selenium.firefox.FirefoxDriver;

public class MoveWindow
{
public static void main(String[] args) throws InterruptedException, AWTException
{
    WebDriver driver = new FirefoxDriver();
    driver.manage().window().setPosition(new Point(0,0)); //move the window to top right corner 
    Thread.sleep(2000);
    driver.manage().window().setPosition(new Point(500,400)); //move the window to 500unit horizontally and 400unit vertical
 }
}

How to use 'Groups' in TestNG


import org.testng.annotations.AfterGroups;
import org.testng.annotations.BeforeGroups;
import org.testng.annotations.Test;

public class GroupsInTestNG {
    @BeforeGroups({"secondGroup","firstGroup"})
    public void executeBeforeGroup(){
        System.out.println("executeBefore both Group");
    }
    @AfterGroups("firstGroup")
    public void executeAfterGroup(){
        System.out.println("executeAfter firstGroup");
    }
    
    @Test(groups="firstGroup")
    public void method1(){
        System.out.println("method1");
    }
    @Test(groups="firstGroup")
    public void method2(){
        System.out.println("method2");
    }
    @Test(groups="secondGroup")
    public void method3(){
        System.out.println("method3");
    }
    @Test(groups="secondGroup")
    public void method4(){
        System.out.println("method4");
    }
    @Test(dependsOnGroups={"secondGroup","firstGroup"})
    public void method5(){
        System.out.println("if both group passed then method5 test will execute");
    }
}


testng.xml
-------------

<suite name="Suite" parallel="none">
  <test name="Test1">
    <classes>
      <class name="advancedSelenium.GroupsInTestNG"/>
    </classes>
  </test> 
  <test name="Test2">
      <groups>
          <run>
          <include name="secondGroup"></include>
          </run>
      </groups>
    <classes>
      <class name="advancedSelenium.GroupsInTestNG"/>
    </classes>
  </test> 
</suite> 


Output

----------

executeBefore both Group
method1
method2
executeAfter firstGroup
executeBefore both Group
method3
method4
if both group passed then method5 test will execute
method3
method4

How to handle alert pop-up.

First switch the control to alert pop then accept or dismiss the alert according to your requirement. Then again switch back to main page to perform other operations.

Below are the steps-

WebDriver driver - new FirefoxDriver();

String mainPage = driver.getWindowHandle(); // get the address of main page
Alert alt = driver.switchTo().alert();  //this will switch the control to alert pop-up 
alt.accept(); // to click on OK or to accept the alert pop-up
//alt.dismiss(); // to click on CANCEL
driver.switchTo().window(mainPage); // switch control to main page


How to use Select class to select option from dropdown.

Select class can be used only in one case when dropdown has been created using select tag.


Ex-

import java.util.concurrent.TimeUnit;

import org.openqa.selenium.By;
import org.openqa.selenium.WebDriver;
import org.openqa.selenium.WebElement;
import org.openqa.selenium.firefox.FirefoxDriver;
import org.openqa.selenium.support.ui.Select;

public class SelectOption {
    public static void main(String[] args) throws InterruptedException {
        WebDriver driver = new FirefoxDriver();
        driver.manage().timeouts().implicitlyWait(10, TimeUnit.SECONDS);
        driver.get("http://commentit.us/skuline/users/signup");
        WebElement accountType = driver.findElement(By.xpath("//select[@id='UserUserType']"));
        Select sel = new Select(accountType);
        sel.selectByVisibleText("Buyer"); //this will select from dropdown 'Buyer'
        Thread.sleep(2000); //simply wait so that u can see whether it selected option or not
        sel.selectByIndex(0); //this will select 1st option from dropdown '-Account Type-'
        Thread.sleep(2000);
        sel.selectByValue("P");// this will select public which has value="P" in the html tag
  }
}

Running Selenium Webdriver tests in Jenkins using Maven

Step 1) Unzip Jenkins to specified folder. Run exe file as shown in following screenshot:
Step 2) In Jenkins 1.607 Setup window click on Next button.
Step 3) Click on Install button in the end.
Step 4) Once installation is done, navigate to the Jenkins Dashboard (http://localhost:8080 by default) in the browser window.
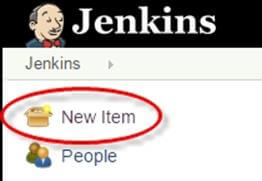
Step 5) Click on the New Item link to create a CI job.
Step 6) Select the Maven project radio button as shown in the following screenshot:
Using the Build a Maven Project option, Jenkins supports building and testing Maven projects.
Step 7) Click on OK button. A new job with name "WebdriverTest" is created in Jenkins Dashboard.
Step 8) Go to Manage Jenkins => Configure System as shown in the following screenshot.
Click on JDK installations and configure JDK as in the following screenshot:

Step 8) Go to the Build section of new job.
  • In the Root POM textbox, enter full path to pom.xmlin
  • In Goals and options section, enter "clean test"

Step 9) Click on Apply button.
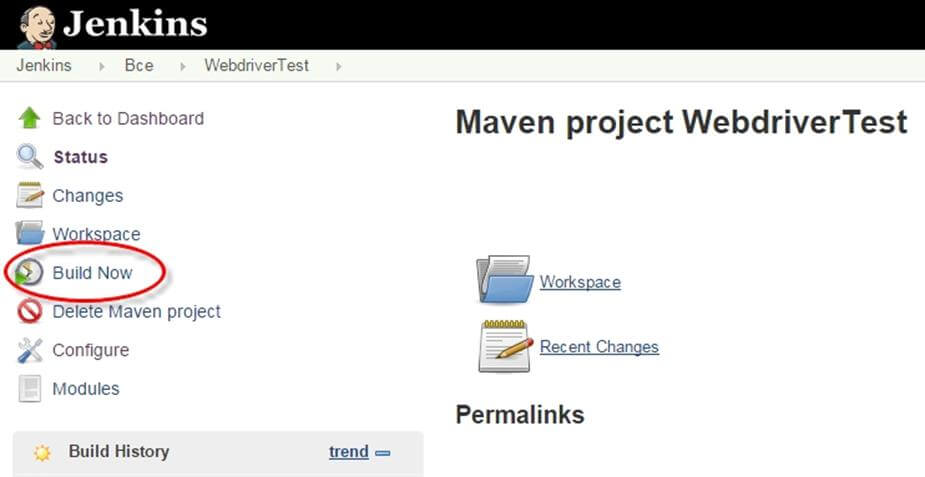
Step 10) On the WebdriverTest project page, click on the Build Now link.
Maven will build the project. It will then have TestNG execute the test cases.
Step 11) Once the build process is completed, in Jenkins Dashboard click on the WebdriverTest project
Step 12) The WebdriverTest project page displays the build history and links to the results as shown in the following screenshot:
Step 13) Click on the "Latest Test Result" link to view the test results as shown in the following screenshot:
Step 14). Select specific build, and you will see the current status by clicking on "console output".

Scheduling Jenkins for automatic execution.

Scheduling builds(Selenium Tests) is one of the important features of Jenkins where it automatically triggers the build, based on defined criteria. Jenkins provides multiple ways to trigger the build process under the Build Trigger configuration.
For example:
Enter 0 23 * * * in the Schedule textbox as shown in the following screenshot. This will trigger the build process every day at 11 p.m.

Using Jenkings without Maven

To run pure TestNg script in Jenkins, enter the following in build
D:>java -cp "Pathtolibfolder\lib\*;Pathtobinfolder\bin" org.testng.TestNG testng.xml
  • Click on Save button.
  • Note: The actual path of lib and bin folder need to add in above command.
  • After saving the command, Jenkins will build project in predefined time, and this command will be run using TestNG.
  • Result will be stored in custom report HTML file that can be sent via email with a Jenkin configuration
  • Output of the code will be